This post will explain how to create a project in spring mvc step by step using eclipse. You can use any eclipse version having maven and spring plugins installed. I am using Spring tool suite here. It requires only 4 steps to create a spring maven project in eclipse.
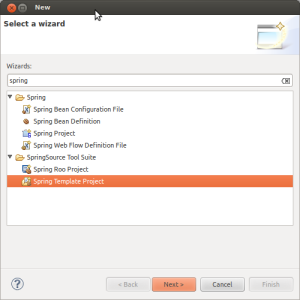
1] First of all open eclipse. Open New file wizard. Search Spring in the text box on wizard. Select Spring template project in below wizard.
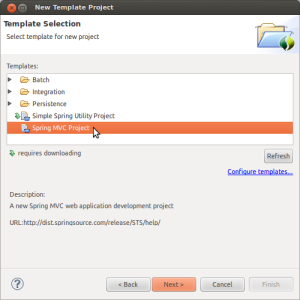
2] Clicking next will open project template selection wizard. There are many template projects available. Select Spring MVC Project for now. That’s where we are going to start our spring journey from.
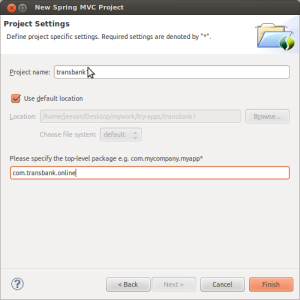
3] Select Spring MVC Project. Clicking next will open Project settings wizard. It will ask for project name, location and 3 level package.
4] After providing all the information needed, click finish button. That’s it. You have a spring mvc project created.
Look at the project structure in Eclipse navigator on left side. There is a file named pom.xml. POM stands for Project Object Model. This file contains all the maven dependencies which you are going to need & description of your build process. If you want to search for any dependency, search maven repository.
You can always build this project into war file using eclipse by right click on project folder -> Runa As -> mvn clean -> mvn install. You will find the war file in target directory. If you prefer command line tools to build projects, open terminal / command prompt. Go to the project directory where pom file is located. and run commands like below.
root@ubuntu:~/home/transbank$ mvn clean
root@ubuntu:~/home/transbank$ mvn package
OR
root@ubuntu:~/home/transbank$ mvn install
The other way to create Spring MVC project is via command line.
I assume maven environment variables are set up. Using command line tools to create spring mvc project will work on any linux, unix, windows and mac systems.
Go to the directory where you want to create your new project. And use following command to create project.
mvn archetype:generate -DgroupId={projects-package-name} -DartifactId={your-project-name} -DarchetypeArtifactId=maven-archetype-webapp -DinteractiveMode=false
This will create a project directory. To make it possible to open project in eclipse, use following command.
mvn eclipse:eclipse -Dwtpversion=2.0
Resources directory under main contains mostly properties file and xml files which are used to store things we use for configurations and things which can change later on. You can put your css, js and font files in resources directory under webapp. Everything else is pretty self explanatory.
You can always clone this project from my github repo. Happy coding!


Thanks Jeevs ,Nice blog helps me to create maven project and using annotation ..Please can you help me to understand the security in spring .
Thanks Tushar. Spring security is next in line. For sure you’ll be able to see some progress on it.